
Showing posts with label cake. Show all posts
Showing posts with label cake. Show all posts
Monday, 17 February 2014
Thursday, 7 February 2013
I've Been A Bad, Bad Blogger

I can't believe it's been so long since my last update! I have had a load of projects since the last entry, it seems I know a lot of people who have friends and family celebrating birthdays etc between September and December! November was crazy. I also became shamelessly addicted to Cupcake Wars during my absence as well (and more specifically the very cute carpenter brothers on the show, haha). I have tried out a bunch of crazy cupcake flavours from sweet potato to sharp cheddar (both of which were very tasty I might add). Lastly, I have been trying to make a go of starting a cake decorating business! Part time for now anyway, I still work my 9-5 every day but I'm trying to drum up some cake jobs on top of it (for the time being it's mostly co-workers or family and friends).
Anyways, I wanted to share some pictures of the projects I've had in the last few months.
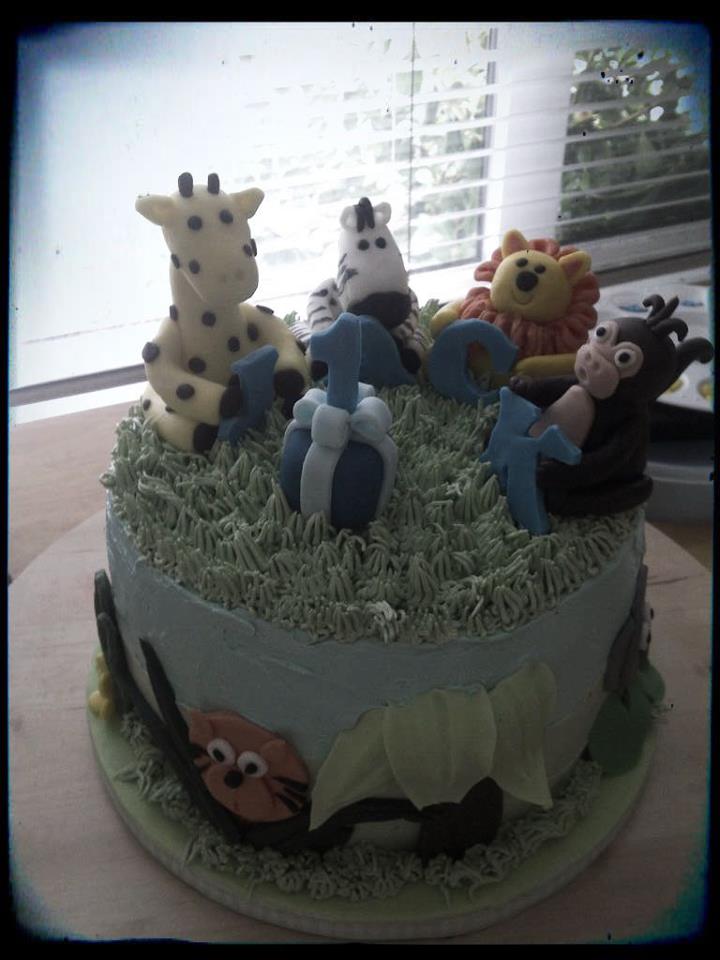

Jungle themed cake and cupcakes for a 1st birthday.

Chanel handbag birthday cake for an expectant mother.

A cake inspired by the album artwork for Above & Beyond's album 'Group Therapy'.


Handbag cake with high heel shoe cupcakes.

Tea themed cake.

Monster High cake


Zombie Hello Kitty and skull cakes for Halloween

KFC drive thru cake (which was huge. It was on a 24" square wooden cake board and was made up of 12 cakes inside).

GAA themed 18th birthday cake

Another Chanel handbag cake (these proved quite popular for me).

Christening cake

My third Chanel handbag cake

Corset cake.
Optimus Prime cake.

In The Night Garden cake.

15th birthday cake.

And finally, Christmas cupcakes!
More projects due soon so I promise I'll share them as soon as I can. Thanks for reading!
Friday, 24 August 2012
More Cakes and Cupcakes From Recent Projects
Since the last post I've had a few more requests for cakes and cupcakes so here are the projects I've been doing in the last couple of weeks.

This was for a friend's 30th birthday (obviously he's a huge Star Wars fan!)


Vintage themed cupcakes for a 21st birthday vintage tea party. Vanilla and red velvet cupcakes with a few different frostings - vanilla, chocolate, mint, raspberry, mango and caramel. All edible toppers made from a selection of fondant, candy clay and candy melts.

A Manowar cake, co-worker asked me to do this for his friend's 21st birthday.
Don't forget I have a Facebook page so you can stop by and 'Like' the page.
Saturday, 7 July 2012
Cake Projects Since the Last Post
I'm sorry I haven't posted an entry in so long, I did not abandon you! I have been a busy lady doing cakes for birthdays and cupcakes and even my very first stall (and boy was that exhausting!!)
I'm just going to post the pictures of the projects I've done over the last month or so to give you an idea of what I've been up to (no pictures of the stall unfortunately, I was so tired on the day that I forgot to get some, so tired I even got the frosting on my testers mixed up, oops!!)
Anyways, first up was a JLS cake as designed by the birthday girl herself:

Then there was a Barcelona Football Club cake and I did themed cupcakes to go along with it:


I volunteer at a small movie theatre in Belfast as well and they recently had an event where the staff "hijacked" the screen and put on a movie of their choice. The winner was the Joss Whedon film 'Serenity' so I whipped up some Serenity/ Firefly themed cupcakes for the staff who ended up having to work that night:

The most recent project I had was a One Direction birthday cake for a co-worker's granddaughter. Instead of a fairly normal circle or square cake I was asked to make a One Direction t-shirt cake:

I hope you like the cakes, there are more to come this month like a Manchester United football shirt cake and an Elmo cake! Next month is a race car and my friend's 30th birthday cake too. Thanks for stopping by!
Friday, 25 May 2012
WWE Championship Belt Cake
I was asked by a co-worker to do a WWE themed cake for her son's 5th birthday. I thought instead of a wrestling ring cake I would set myself a little challenge and attempt a WWE belt cake.
I printed a bunch of pictures off the internet and photocopied them and enlarged them so that I could make stencils for cutting out the details. After that I just needed a can of gold lustre spray, some silver food paint and a load of black and white fondant (not to mention a couple of tubs of silver dragees!)
Here is the finished product!

More photos of it are on the facebook page.
Thursday, 23 February 2012
Very Hungry Caterpillar Cake

It was my godson's second birthday this week and I was asked to make his cake. Last year he got a 3D teddy bear cake (he was named Henry and we felt very bad about cutting into him when the time came, sorry little guy!). So this year I turned to my good friend, Google image search to find inspiration for his cake. He is a big fan of the Very Hungry Caterpillar book so it was my first search, and after scrolling for pages and pages I finally found one that would fit the bill.
The actual cake is pretty straight forward: 2 tiers (any kind of cake you want, this one was red velvet and vanilla with green vanilla buttercream), white fondant covering. It's the bits after that you get to have fun with and use your imagination for the finishing touches.


You can use fondant to make a caterpillar for the front of the cake (I use edible glue to stick all the decor on, but if you use a paintbrush to dab water onto the fondant it will stick too). Around the back and sides I used fondant in a variety of colours to make fruits lollipops to decorate. I invested in a collection of writing gels as well which is what I used for all the detail on the fruit and to draw on the lollipop stick, and the face on the butterfly.
For the topper, I bought sugar balloons on wires from a cake decorating store, as well as a number 2, which was white, but I used edible paint to colour it green to tie it in with the caterpillar. Using my writing gels I also spelled the birthday boy's name out on individual balloons.
The tiers are finished off with Skittles candies which are glued in place with the edible glue. You don't have to use Skittles though, Smarties, M&Ms, jelly beans would all do the trick too.
Monday, 20 February 2012
Tiffany's Box Birthday Cake

Who doesn't love the movie Breakfast at Tiffany's? It's a classic, right? Audrey Hepburn and George Peppard are totally cute in that movie. My friend also loves this film so I was trying to find a way to incorporate that into her birthday cake. At first I was looking into Audrey cake or cupcake toppers but decided to go with a simpler approach and have the cake look like a box from Tiffany's instead.
What you need for the cake:
Cake of your choice
Frosting of your choice
Duck egg blue fondant
White fondant
Pearl lustre spray
Once you have your cake(s) baked leave them to cool completely then trim them into the shape you want (I did square). Frost the cake on the top and sides, and in between layers if applilcable. My cake was four cakes high, I just really wanted some height to it.
Next, roll out your duck egg blue fondant, then cover your cake, trim and smooth. Roll out more of the blue and add another layer to the top to form a lid for your box. Use a scapel to get a good sharp edge on the lid.
Roll out your white fondant and cut out your ribbon for the box. This is where I used the lustre spray to add a satin ribbon effect to the fondant. Allow to dry before lifting the ribbon otherwise you'll get fingerprints in the lustre and also your fingers will look like you've manhandled Tinkerbell.

You can leave the cake like this, it looks pretty. Your can also go a step further and make a bow out of fondant (and lustre spray) to top the cake. I had no clue how to do this so I took to Youtube to find a video to learn how.
And this was my finished product...


Tuesday, 14 February 2012
Valentine's Day Cake

I stumbled across the design of this cake last year when I found myself going through a load of old posts on Bakerella's website. I decided to make it for my wee mommy for Valentine's Day since for as long as I can remember she has made me a bag of goodies every year (usually consisting of socks, a keyring, chocolate or other V-Day themed items she finds in the stores) so I figured this year I'd surprise her with a little something for her.

Basically, this can be any kind of cake, but my mother's personal favourite is red velvet. I got myself a moderately-sized heart shaped cake tin from ebay (though this design would work in other shapes too).
To make this you'll need:
Your chosen cake tin
Another cake tin for the excess batter (or another batch of batter, depending on the size of the cake)
At least 1 batch of frosting (again, it's up to you what kind you use)
Chocolate (milk, plain or white)
Decorations for your cake balls (sprinkles/ glitter/ candy melts)
Red fondant (or white fondant and red food colouring)
Mini cupcake cases
Bake your cake as normal. Leave to cool and then take the extra cake, crumble it into a bowl and then mix in enough frosting to bring all the cake crumbs together, but isn't too sticky. Roll your mixture into walnut sized balls and place on greaseproof paper on a baking tray. Once you have rolled enough, place the baking tray into your freezer to help them firm up. This will make the coating process much easier later on.
Roll fondant out over a cake board (I use edible glue to keep it in place) and centre your cake on the board. Spread your chosen flavour of frosting over the top and sides, any messes can be cleaned up later with some kitchen paper. Roll out some more fondant and cover the top of your cake and trim any excess fondant off for a clean line around the top. Roll out even more fondant in a long strip, this will form the sides of your "box". Make sure the fondant you roll is thick enough to stand up and not flop over, it should also be slightly taller than the side of your cake.
Melt your chocolate in a bowl over a saucepan. Take the tray of cake balls out of the freezer, and using 2 teaspoons, roll them in the melted chocolate until they are covered and place them back on the tray. Add sprinkles or glitter now before the chocolate sets. Once you are happy with your cake balls, place them either in the fridge or freezer so that the chocolate can set completely.
Finally, place your cake balls in some mini cupcake cases and arrange them in your box cake.
Original idea from Bakerella website
Cake balls technique also from Bakerella website
Wednesday, 11 January 2012
Bake A Cake In A Mug In Your Microwave!
Whilst on lunch break at work I often look through Google images for cake decorating ideas, or amazon for new recipe books, or baking blogs for anything and everything. I stumbled across this recipe yesterday and I did try it last night but wasn't satisfied with how it turned out so I tried it our again tonight and got much better results.
Ingredients:
4 tbsp plain flour
4 tbsp granulated sugar
2 tbsp cocoa powder
1 egg, beaten
3 tbsp milk
3 tbsp vegetable oil (or canola oil)
3 tbsp chocolate chips
1 tsp vanilla extract

(I would've included flour in the photo if only the bag I had weren't a huge 25lb sack, lol)
First, put all the dry ingredients into your mug (try to find a mug that's slightly larger than normal, I used a normal sized mug the first time I made this and there was a little overspill). Mix the dry ingredients with a fork until well combined.

Next, beat your egg and add to the mug. Mix well, it will be very sticky.

Stir in your milk and oil. The mixture will become much easier to mix. Make sure you scrape the bottom of the cup with your fork to get any unmixed ingredients.

Add in your chocolate chips and vanilla. If you don't want to use chocolate chips, get creative! I used mint chips the first time I made this, for this attempt I used butterscotch chips and toasted pecans. For a more colourful cake add M&Ms, or use peanut butter chips. Try toffee pieces or fudge! Whatever your sweet tooth is craving, throw it in there!

Mix the ingredients again, then move it to the microwave! Cooking times are around 3 minutes for a 1000W microwave or 4 minutes for a 700W microwave. To be safe (and to save on clean up time) put a plate under your mug when it's in the microwave.

When your cake is done, remove from the microwave and use a cake tester to see if it is cooked properly, it should come out clean when you insert in into your cake. The cake will also deflate slightly as it cools.

And there you have it! A perfectly sized individual dessert ready in about 10 minutes! It's great if you want a quick sweet treat and don't have a lot of ingredients on hand. The cake is really hot so even though it might smell super yummy be careful when you tuck in.

Enjoy!
Subscribe to:
Posts (Atom)